
How to connect to Databricks in the AtScale Developer Edition
Overview:
When you download AtScale Developer Edition, you get a pre-installed connection to Postgres. However, you can also connect it to other data platforms that you may want to use.
In this article, we’ll give you a step-by-step guide to connecting the AtScale Design Center to Databricks.
Prerequisite:
- Ensure you have Databricks installed on your computer and a valid license.
- Download and install the AtScale Developer Edition following these instructions.
Install:
For this guide, we will use the tutorial models that come pre-installed with AtScale Community Edition as a sample.
Open the GitHub repo sml-models. There, you will find the three tutorial models in the Model Library. These are:
- Internet Sales – a simple, single-fact model derived from the fictitious AdventureWorks retail dataset.
- World Wide Importers – a more complex, multi-fact model that represents a fictional wholesale and distribution company
- TPC-DS – a complex, multi-fact model that encodes the TPC-DS benchmark model in SML.
Accessing Your Data Set
To start, open the Databricks console.
- On the left menu, click Marketplace.
Note: If this option does not appear, you may need to ask your Admin team for access.
- In the search bar, enter AtScale and open the AtScale Tutorials data set.

- Click Get instant access at the top right.
- In the pop-up, change the catalog name to “atscale_tutorial_data”.
Note: This catalog name will appear when you connect it to your SML.
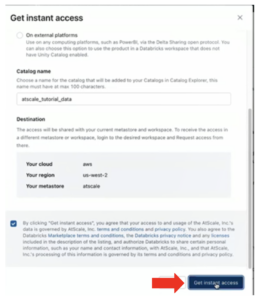
- Check the box to accept the license requirements.
- Click Get instant access.
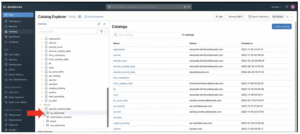
- Click Open at the top right.
- In the Catalog Explorer, scroll down to “Shared”. The AtScale tutorial data catalog with the schemas — as_adventure, tpcds, ww_importers — should now be visible.
Generating a User Token
There are several ways to connect to Databricks clusters. In this example, we will use token-based access.
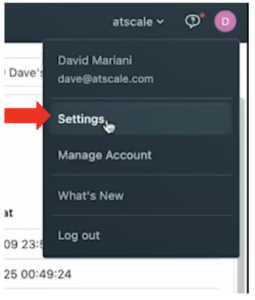
- Click on the Profile icon in the top right of the screen.
- Click on Settings.
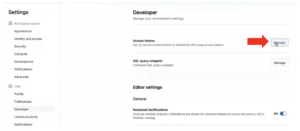
- In the Settings menu, under User, click on Developer.
- In the Access tokens option, click Manage.
- In the “Generate new token” pop-up, enter a name for your token that describes its purpose and assign a lifetime you want to use.
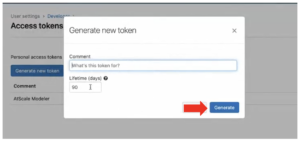
- Click Generate.
- Copy the generated token and save it for later.
Note: This token will be your password when connecting to the AtScale data warehouse. GitHub will only show the token at this point. Save the token somewhere safe that you can easily access. If you lose this token, repeat this process to generate a new one.
Creating the Data Warehouse
- In the left sidebar, go to the SQL menu.
- Open the SQL Warehouses option.
- Click Create SQL Warehouse at the top right.
- In the Overview tab, rename the warehouse.
- Choose the cluster size for the kind of data you need.
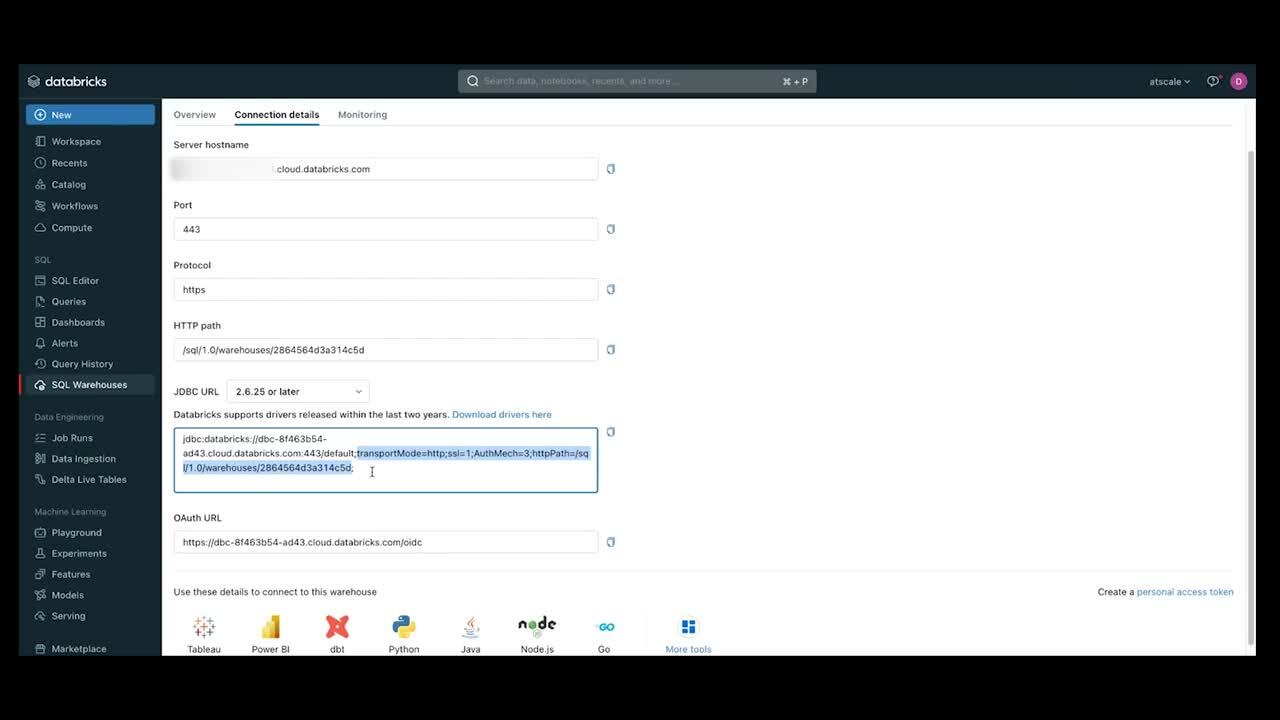
Note: To find the right size for your serverless SQL warehouse, it is best to start with a larger warehouse than you need and size down to fit as you test. - Open the Connection details tab.
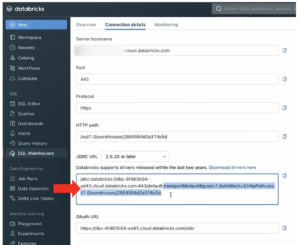
- Enter the Server hostname.
- Enter “443” in the Port field.
- Under the JDBC URL, select and copy the path for the driver.
Note: Select and copy only the part of the code between the semicolons (;)—starting at “transportMode=” and ending before the final semicolon at the end. Do not include the semicolons. Copy this text. You’ll use it to establish the connection in the next step.
Set Up a Data Warehouse Connection with AtScale
There are two stages to creating a connection to a cloud data warehouse.
- Create a Data Warehouse group.
- Establish the connection.
Data warehouse groups allow different resources for different activities, such as serving queries or building aggregates, which might require different-sized warehouses. In this example, we will simply create a single connection.
Create a Data Warehouse Group
Go to AtScale Design Center. In the Repo Browser, you will see your three tutorial models.

-
- At the top left of your screen, click the ellipsis next to the AtScale icon.
- Open the Settings and select Data Warehouses.
Note: AtScale Developer Community Edition has a pre-installed connection to Postgres. You’ll now add a connection to Databricks.
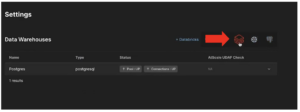
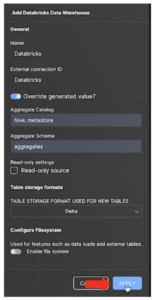
- Click on the Databricks icon to open the Add Data Warehouse panel.
- In the Name field, type in “Databricks”.
- In the External connection ID field, also type in “Databricks”. Note: This external connection ID will be your SML connection object.
- Type in the chosen Aggregate Catalog and Aggregate Schema.
Note: This defines where AtScale will write and store the aggregate tables generated based on user activity. This is what allows AtScale to make queries quickly. - Under Table storage format, select Delta so that AtScale can create aggregate tables as delta tables.
- Toggle the switch to disable the file system.
- Click Apply.
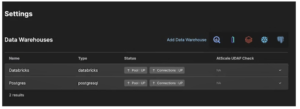
- When the screen refreshes, the new Databricks warehouse will appear. However, the status will be listed as “No connections defined”.
The next stage is to establish a connection.
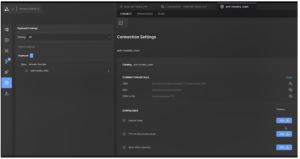
Establish the Connection
-
-
- Click the ellipsis to open the options on the new Databricks warehouse.
- Click + to add a new connection.
- Enter “Databricks” as the connection name.
Note: When setting up a data warehouse group with multiple connections, make the connection names more specific, such as “Databricks aggregates” or “Databricks small queries”. - In the Host field, enter the same server hostname from the Connection details tab on Databricks.
- Enter “443” in the Port field.
- In the Extra JDBC flags field, paste the JDBC URL code (beginning “transportMode=”) that you copied from Databricks.
Note: This will define the transport mechanism and the HTTP path. Ensure that the semicolons are not copied, as this will produce an error. - Under Authorization, type “token” as the username.
- In the Password field, add the developer token created earlier.
Note: There are multiple ways to authenticate to Databricks SQL serverless warehouse. In this example, we use password authentication, with the token generated in Databricks. Repeat the above process to generate a new token if you have lost this token.
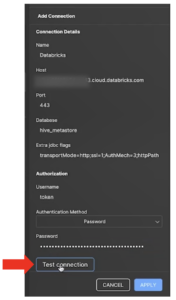
- Click Test connection. A “Connection successful” notification should appear.
- Click Apply to complete the process.
- The screen should update. The Databricks warehouse should now display Pool and Connection as “UP”.
-
Databricks is now connected correctly.
Change the Connection Objects in SML
You now need to refer to each data model’s new data warehouse connection in SML.
-
-
- From the AtScale icon, open Repo Browser.
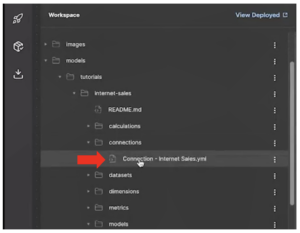
- In the Workspace, go to models→tutorials→internet-sales→connections.
- Click on Connection – Internet Sales.yml
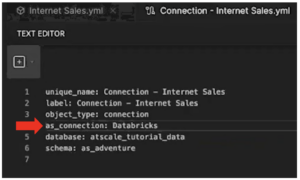
- In the Text Editor, change the AtScale connection object (as_connection) from “Postgres” to “Databricks”.
Note: This must match the external connection ID you entered when creating the data warehouse group earlier. Note also that the database is displayed with the catalog name “atscale_tutorial_data” you created when accessing the dataset from the Databricks Marketplace.
- Click Save file at the bottom of the page.
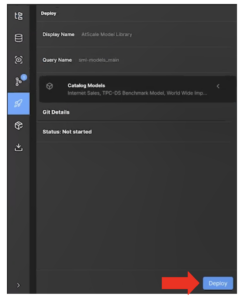
- Click Deploy in the Repo browser
- In the Deploy menu, click Deploy.
- Once it has deployed, click the Catalogs icon on the left sidebar.
- Go to Repo: AtScale Tutorials→sml-models_main to pull down your connection strings.
- Repeat this process for the other tutorial models: tpc_ds and ww_importers.
- From the AtScale icon, open Repo Browser.
-
With the connections deployed, you’re now ready to run queries on your models against Databricks instead of Postgres.