
How to install the AtScale Developer Edition

Overview:
AtScale has released a new Developer Edition that is free and available for public download. This article will focus on how to install the new Developer Community version of AtScale.
Prerequisite:
- Assume you have requested access to the Developer version.
- Assume you have received a license key and unique download link from AtScale.
Download AtScale
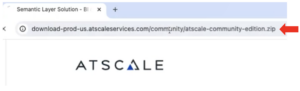
- Copy the unique download link you received from AtScale and paste it into your web browser. Hit Enter. The ZIP file for AtScale Developer Community Edition will begin downloading.
- Open a Terminal window or Command Prompt.
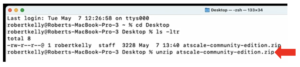
Note: There are multiple ways to open a terminal, depending on your operating system. On Windows 11, hit the Windows key (or click the Start icon on the taskbar) and type “terminal” into the search bar. - Type the command to locate the zip file.
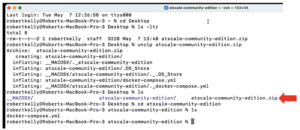
Note: The commands will vary depending on your operating system. - Type in the command to unzip the file.
Install AtScale
- Launch Docker on your system. It is important Docker is running before you proceed.
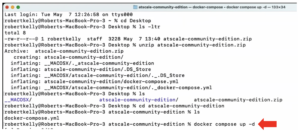
Note: For information on how to install Docker, read our quick guide, How to Set Up Docker. - In the terminal, go into the atscale-community-edition folder.
- Run Docker by typing “compose up -d”
- This will bring up AtScale, and Docker will pull down the AtScale files.
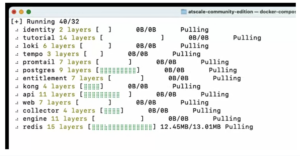
- Once Docker has pulled down all the files, it will create and start up each container.
Note: This may take a few minutes to build the containers and set up AtScale, depending on the performance of your internet connection.

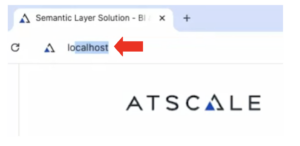
- Now switch back to your web browser window and navigate to “localhost”.
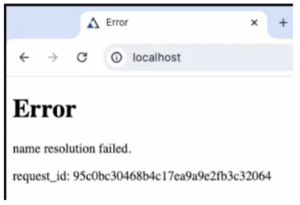
Note: If AtScale has not finished set-up and configuration in the background, you may get a “name resolution failed” error message with the request ID. If this happens, wait a few moments and refresh the page.
Sign in to AtScale
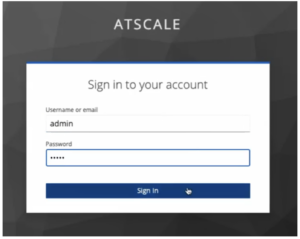
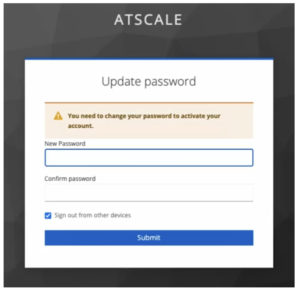
- Once AtScale is fully set up, the login window will appear. Enter “admin” in both the Username and the Password fields. Click Sign in.
- AtScale will request that you update your password from this default admin password. Enter your chosen password in the New Password field and repeat it in the Confirm Password field. Click Submit.
Register Your AtScale License
You will now need to add the license file you received from AtScale into the AtScale system.
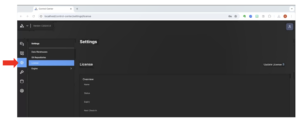
- In AtScale, open Settings by clicking on the gear icon in the left sidebar.
- Select License.
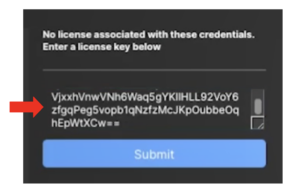
- On the right side of the screen, click on Update license.
- In the panel, enter the license key you received from AtScale and hit Submit. AtScale will now open up.
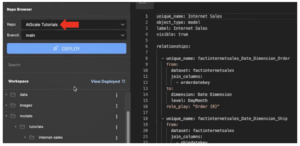
- Finally, make sure you have access to the AtScale tutorials. Click on the ellipsis next to the AtScale logo.
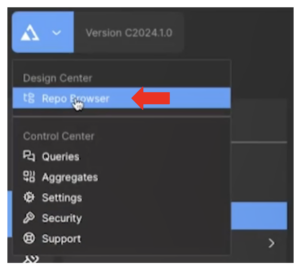
- Select Repo Browser. This should show you the AtScale Tutorials.
Congratulations! You’ve successfully installed AtScale.